
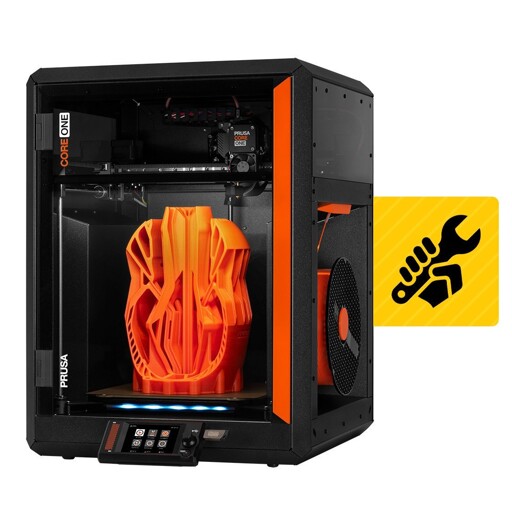
Prusa3D Core One assembled from kit ( https://www.prusa3d.com/product/prusa-core-one-kit/ ) in roughly 36 hours, including 5 hours of sleep and frequent toddler-herding
Quite fun and satisfying
I did make a few mistakes, but wholly my own, and avoidable by reading the actual instructions
Benchy test print (15 minutes) is complete, so I guess I can start planning holiday show-bag gifts for nieces and nephews
My MK3S+ took me a solid 10 hours of working on it straight, basically spent an entire Saturday on it. It was one of the more difficult things I’ve done, probably would’ve been easier in two sittings, but I was too excited haha. I think my main issue was that I ate the gummy bears before opening the manual and learning that they were needed for construction.
At first I thought weed gummies and then i read the last part. How are gummy bears used for a 3d printer construction? Or is this some sort of joke that went over my head?
You get a bag of haribo golden bears with the kit, manual has callouts after completing a section to treat them as a reward for completing a milestone, intro page talking about it
Haha that’s great. Love the disclaimers
You spent 30+ hours working on assembling this, or you finished it 36 hours after starting it, but spent a lot of time focusing elsewhere as well?
Howdy!
In the Core One kit, the only pieces that are already assembled for you are things that would need soldering, e.g. electrical components like PCBs and motors
Everything else is separate and needs to be screwed together carefully with the hundreds of different screws they provide :)
It’s my first time assembling such a project, and my other issue is that I have a very curious toddler that was playing games with me and with the pieces when I wasn’t looking: I’m sure a much faster assembly time is possible with dedicated focus and not having to frequently stop a child from hurting themselves
It says right in the post that at least 5 of those hours were sleeping
And I subtracted those hours and more from my question in the first place. Still a strange way to count your time. The title gives a sticker shock of taking 36 hours to assemble the kit. How much time did it actually take to do so? Five or six hours spread across a day and a half? Could it have been less if a focused effort could have been afforded? I am just surprised at the idea that it could have taken more than an hour or two, frankly.
You have a valid point about 36 hours being crazy, but an hour or two is also crazy. The kits are not in 3 pieces instead of 1, they are in pieces, and the parts come in bags like Legos. My Mk3s+ took me 10 solid hours to assemble.
The assembly instructions PDF is 210 pages long.
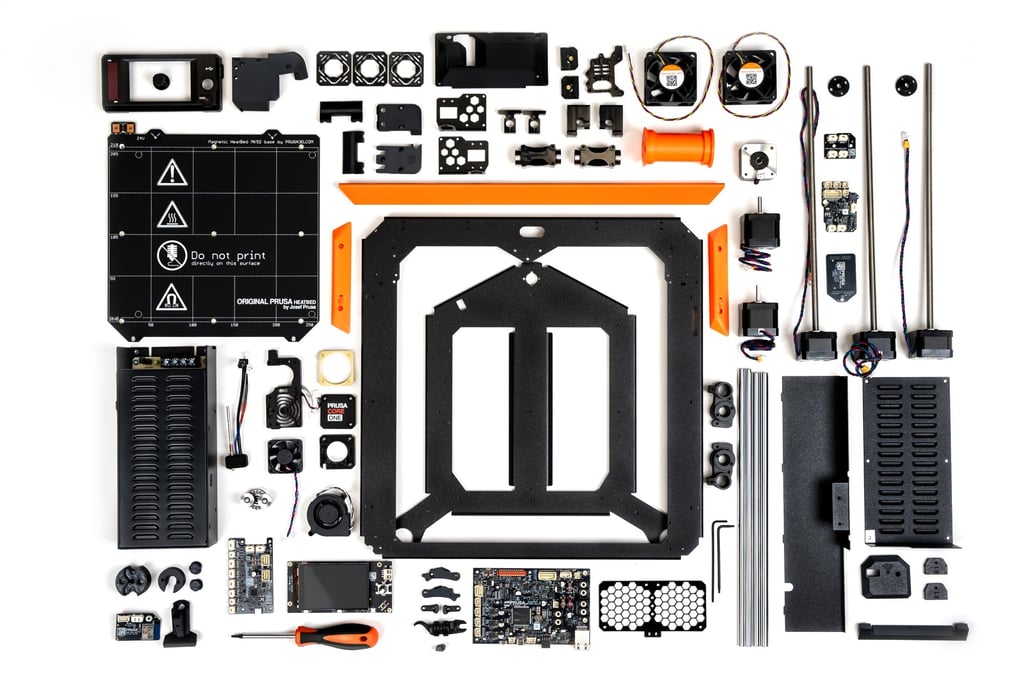
If you own a 3d printer, imagine entirely disassembling it: take out every single screw, nut, bracket, motor, pcb, wire, bearing, belt, panel - literally everything to as individual component as possible - and put them all in a box. That box is what Prusa sends you when you buy a kit.
One or two hours? Sorry but I don’t think you realise exactly what’s need to be done here. It’s not like some other kit which are partially assembled, and the assembly process is probably the main key part to get very good print quality. Can’t recall how often I’ve seen people trying to diagnose some print errors while the issues were not due to calibration or settings but due to assembly, so being focus and taking all the time you need for this process is crucial as it isn’t like assembling some IKEA furniture. Does 30 ish hours sounds a lot, yes but if it the time that person needed to do things correctly because of its lifestyle and knowledge/confidence, that’s perfectly fine. Would some other do it in way less time? Sure, but maybe they have mount several before and know exactly all the key points to look out, they will recognise every single piece on one sight and will need way less time to think about the next step and how to do it correctly.
I don’t know what the kit consist of, hence my asking questions about the process. My anycubic kobra 3 max came packed flat, but was maybe a 10-15 minute assembly including unboxing
Here is a part of the kit to give you an idea
Building my v2.4 was spread out across multiple days, I didn’t rush anything. A lot of that time was spent making sure everything was square, tramming the gantry, cabling took a while. There’s a lot of small fiddly stuff, bearings that you’ll not want to damage, things you don’t want to accidentally pinch so while you could probably bang out a kit pretty quick once you’ve had some experience, I’d still really want to take my time with it, put time and care into the assembly and it’ll pay off with quality and reliability.
And to be fair to the total time I spent, I spent time trying to understand how things all worked together while assembling it, active assembly time was only a fraction of it.
Yeah, I’m not sure 1-2 hours is normal here, haha: https://www.reddit.com/r/prusa3d/comments/1nxuhw7/core_one_build_time/
I think with experience and practice it could take 6-8 hours but most folks seem to take at least 12
When I bought my Mk3s kit during covid, I spent an entire weekend assembling it and I was sad when I finished it. I spent maybe 20 hours on the assembly because I didn’t want the journey to end. I could have easily done it in 5 or 6 hours. Lots of breaks with cups of tea consumed, (and trips to the bathroom).
But the world demands instant gratification, open the box, plug it in, and print your first benchy. But if you slow down, you might find the journey is as enjoyable as the destination.
And if you bought an Ender 3 back in the day, perhaps the trip to printing was better than the destination…
I worked for a small print farm doing printer maintenance, and that included building several Prusa Mk3s. I got it down to about 6 hours.
Yep, haha, I’m actually having a little bit of that grief: “now that it’s complete and working … what now?”
I already have a Sovol3D SV06 ACE, but there are some projects that I’ve been putting off until I had a bigger bed size
And I’ve been making holiday gift bags for my nieces and nephews, and having a second and faster printer will be a big improvement there
I also have a Bambu Mini and it was a disappointing unboxing and setup. I think it took longer to get the machine registered and run the calibration than hooking up the AMS lite and plugging everything in.
And Prusa’s assembly instructions were the best I have ever seen. My Mk3s came with a large full color photographed and printed manual showing every step and assembly with a complete description. It was glorious.
My old SV06 at home often had better bed adhesion than the same prints on a Prusa MK4S at work. The SV07 Plus had the bigger bed I wanted, but it didn’t print as well as the 6. Lots of large failed prints and layer quality issues.
But now you have the next adventure opportunity: 3D printing quality of life upgrades for the printer!
I recommend looking into the ball bearing spool holder, the skadis organization mods for the left side alcove, purge bin, filament guide, vent handle, and more. Printables has a whole bunch of useful options.
Yeah, the benefit of getting a popular model is that there is an ecosystem around the Core One
I do plan on using the Core One to print some improvements for the SV06 ACE, mostly alternative chassis that allows for larger and much quieter fans
I’m so impressed with how much quieter the Core One is
It took me a week to assemble my mk4 last year, between work, cores and kids but I loved the process.
I loved the process as well. The instruction is very well made and it’s an extremely satisfying process.
The printer is now getting close to 2500 hours of printing and still printing well.


