

I’ve been experimenting with foldable 3d prints for tall thin walls in some game organizers. (Bigger pictures below.) The principle here is sort of similar to a living hinge, but not designed to flex too many times. Just fold once and be a reasonably stable structure.
Here are some individual pictures of the designs I’ve made, for corner support of some game organizers. Below, I have explanation and the design/dimensions that I use.


Overview
I haven’t seen this type of design too often before, so I thought I would share what design and dimensions worked for me. Here is an overview:
-
I design what I call the Wall as an outline, with some cutouts to reduce material. This is the part that prints flat and will fold up.
-
I apply a chamfer to all edges, to help with removal from the build plate.
-
I make a Y-Profile for the fold line grooves. The profile is vaguely Y-shaped, with a short rectangular base and an angled top. (Picture below; the Y-profile is labeled “cut out groove” there.)
-
I use the Y-profile to cut away material from the wall to make those grooves.
-
I print these in PLA (the pictures are matte PLA, because that’s what I had). I guess PETG might be more sturdy, but honestly the PLA was so good that I haven’t bothered with PETG.
Here is a picture, which I’ll explain below.

Design Details
The top of this picture is an edge-on view of the wall (green horizontal lines) and the Y-shaped profile (labeled “cut out groove”). I use the following dimensions:
- wall thickness: 1.5mm
- wall chamfer (not pictured): .5mm
- Y-profile base height (a): 0.3mm
- thickness remaining below Y-profile (b): 0.4mm
- angle of Y-profile sides: 40 degrees from horizontal (45 didn’t fold as well)
- Y-profile base width: (pi/2) x a x 1.1 (=.52mm with other dimensions above)
That last measurement, the width of the Y-profile base, is what the bottom part of the picture is about. The key idea is that width is going to be, roughly, 1/4 the circumference of a circle with radius a. So, I computed that amount, and multiplied by 1.1 to give 10% extra width.
With these dimensions, the part that folds is 0.4mm thick (dimension b in the pictures), then there is a 0.3mm clearance (dimension a), and the two arms of the “Y” fold together. In my first trials I used 45 degrees for the Y arms, but found that I got a better fold making them a little wider (so, lowering the angle from horizontal, to 40 degrees). This basically gives a little extra tolerance for variations in the physical print.
Conclusion
I hope this helps someone! I think it’s a neat technique, and I’m a little surprised that I haven’t seen it used anywhere else. I’ve seen various designs for living hinges, which are roughly the same principle, but designed to flex repeatedly. Searching around, I found one foldable cube on thingiverse. But otherwise I haven’t found any models using this kind of design.
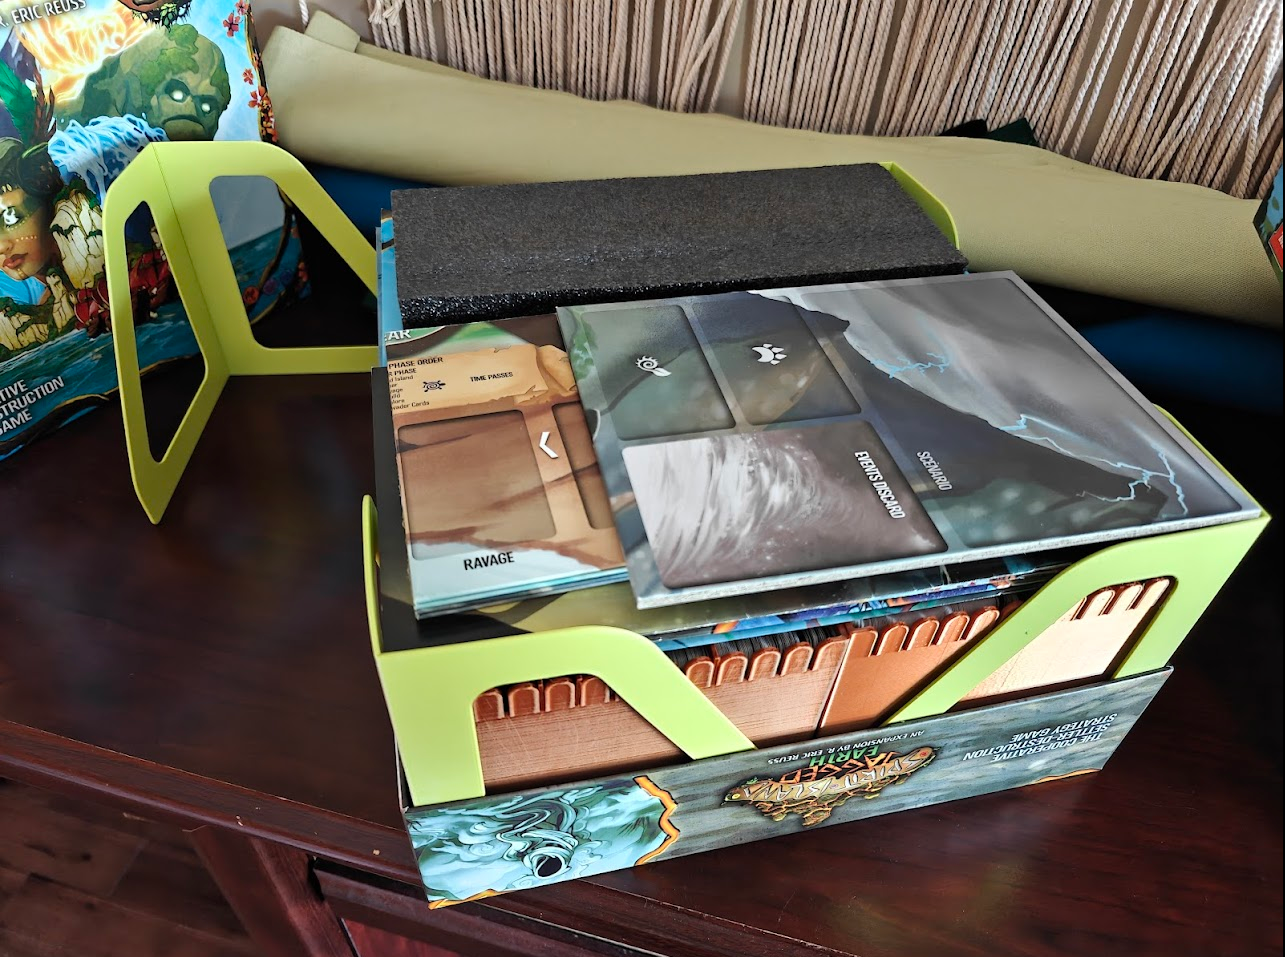
That’s an interesting way to package spirit island! A great game!
Yeah! I know people make full organizer models for it, but mine has grown into its own thing over time, as I add more parts for the new expansions.
Ours is a Frankenstein of parts, we like the holders for the island pieces, split it up to hold the spirit tokens, and have a wood thing outside of the box for the Spirit panels